Why Using Trekking Poles Can Change Your Life Hike
If you’ve ever bought trekking poles and thought, “Cool, now what?” — you’re not alone. A lot of people grab a pair, take them out on the trail, and then spend the first mile poking at the ground like they’re trying to find buried treasure.
The truth is, trekking poles aren’t just about having “something in your hands.” When you use them right, they can take pressure off your knees, keep you balanced on sketchy terrain, and even help you move faster without feeling like you’re working harder. The key is knowing a few simple techniques — and once you do, they’ll feel like an extension of your body.
Why learning to use trekking poles matters
Let’s be honest: there’s a big difference between walking with poles and walking well with poles. Used incorrectly, they’re just extra weight you carry. Used correctly, they’re like having a set of four-wheel drive legs.
They keep you stable when you’re crossing streams, hopping over roots, or navigating loose gravel. They give you extra power on climbs and take the shock out of steep descents. And yes — they even help on flat ground, letting you find a rhythm and conserve energy over long distances.
The best part? You don’t need to be a “hardcore” hiker to benefit. Whether you’re doing the Appalachian Trail or just your favorite weekend loop, learning a few easy adjustments can turn trekking poles into your secret weapon.
This guide will show you exactly how to walk, climb, and descend with trekking poles so they work for you — not against you. And along the way, we’ll link you to some of our favorite gear guides, like Best Trekking Poles – Our Top 10 Picks for 2025 and Trekking Poles Height – The Secret to Comfortable Hiking, so you can choose the right pair before you hit the trail.
Walking with trekking poles – finding your rhythm
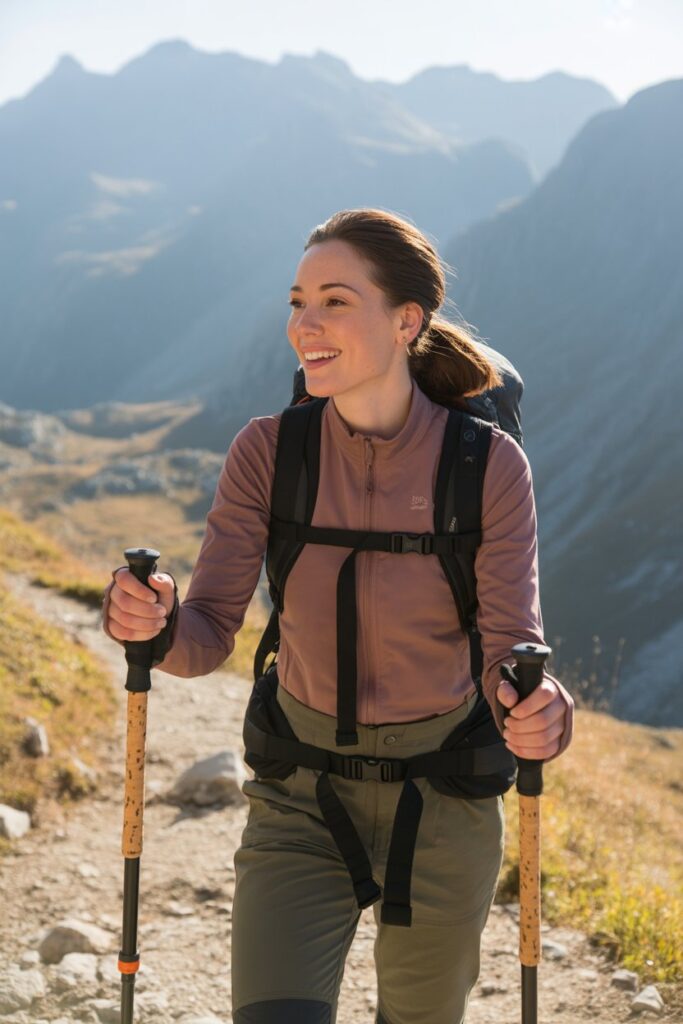
So, you’ve got your poles adjusted to the right height. Great. Now let’s talk about the actual walking part, because here’s where most people either overthink it or underthink it.
The simplest way to start is to walk like you normally would. Your right foot moves forward, your left pole plants slightly ahead of you. Your left foot moves forward, your right pole plants. This is called the alternate method, and it’s what you’ll use 90% of the time. It keeps your arms and legs working together naturally, without making you feel like you’re doing a marching band routine.
When the ground is easy and flat, your poles don’t need to stab deep into the dirt. Just light taps to keep your rhythm and give your upper body something to do. The goal here isn’t to push yourself forward — it’s to keep your balance and take a little pressure off your joints. Think of it like dancing with a partner who knows when to lead and when to follow.
When the terrain gets tricky
Here’s where poles really shine. Steep uphill? Plant your poles just ahead of you, lean slightly forward, and use your arms to push yourself upward. You’re not pulling yourself like a climber on a rope — you’re sharing the load between your legs and arms.
On the way down, the poles act as your shock absorbers. Plant them a little farther in front of you and let them catch some of your weight before your feet hit the ground. It’s like having a pair of extra legs that don’t complain about sore knees.
Crossing streams or rocky patches? Use both poles at the same time for a “double plant.” This gives you a stable tripod position, making it much less likely you’ll slip. And if the trail is covered in mud or loose gravel, planting your poles wider can give you that extra bit of stability to stop you from sliding sideways.
And here’s a pro tip: don’t strangle your poles. Keep a light but firm grip, and let the wrist straps do their job. They’re designed so you can relax your hands between pushes without dropping the pole. If your fingers are cramping halfway through the hike, you’re holding on too tight.
If you want more on picking the right pole for different terrains, check out Best Trekking Poles for Backpacking — it’s full of recommendations for long and mixed-condition hikes.
Climbing with trekking poles – power without the burnout
Going uphill is where a lot of hikers suddenly realize their poles aren’t just “extra weight.” Done right, they turn every uphill section into a full-body workout that doesn’t leave you gasping at the top.
Here’s the trick — shorten your poles slightly before you start the climb. This keeps your elbows bent comfortably and lets you push down without having to lift your arms too high.
Plant each pole just ahead of your lead foot. As you step, press down through the pole to give yourself that extra push. You’re not trying to haul yourself up the hill — think of it like helping your legs share the load. Your calves and quads will thank you later.
If the hill is steep and technical, you can use a double plant technique — both poles go in at once, you step up, then plant them again. This is especially useful on loose scree or rocky slopes where every inch of stability matters.
Also, remember to keep your posture upright. Leaning too far forward puts unnecessary stress on your back and makes it harder to breathe. Keep your chest open, shoulders relaxed, and let the poles guide your rhythm.
Descending with trekking poles – saving your knees for the next hike
Downhill sections can be brutal on joints. This is where poles can literally add years to your hiking life.
For most descents, lengthen your poles by a few centimeters. This gives you a comfortable reach in front of you, so you can plant them before each step and let them absorb some of your weight.
Plant your poles slightly ahead and a bit to the side of your feet. This way, if you stumble, the poles are already in position to catch you.
If it’s steep or slippery, you can go back to the double plant method — both poles hit the ground at once, you step down carefully, then repeat. It’s slower, but your knees will be singing your praises.
On really uneven ground, don’t be afraid to shorten your stride. Quick, small steps with constant pole contact will keep you more stable than long, lurching ones.
And here’s a tip most people miss: don’t lock your elbows. Keep a soft bend so that your arms can absorb shocks. Straight arms turn your shoulders into the shock absorber — and trust me, that gets old fast.
For more on choosing poles that can handle tough descents, you might like Best Lightweight Trekking Poles — those models are sturdy without adding bulk to your pack.
Flat terrain efficiency – keeping momentum without overworking
A lot of hikers think trekking poles are “pointless” on flat ground. Big mistake. Used well, they can help you cover distance faster and with less fatigue.
On level trails, keep your poles at a neutral length (elbows bent about 90 degrees). The motion should feel natural — plant the pole opposite your forward foot, just like your arms swing when you walk.
Think of it as active walking. Each pole plant gives a little push, propelling you forward without adding much effort. Over hours of hiking, this small assist adds up to less strain on your hips and legs.
Avoid overreaching. The poles should land beside or slightly behind your lead foot — too far ahead, and you’re wasting energy pulling yourself forward.
If you’re on a long day hike with a steady pace, use the poles as a metronome. They help you maintain rhythm, which means fewer bursts of speed and slowdowns — a sneaky way to conserve energy.
Special techniques – adapting to tricky situations
Poles aren’t just for walking. On certain terrain, they become multi-tools that help you handle obstacles like a pro.
Stream crossings: Extend your poles a little for extra reach. Plant them firmly upstream from you so the current pushes against the pole and not your body. Cross one step at a time, always keeping two points of contact.
Snow or mud: Use larger baskets to stop poles from sinking too deep. Plant poles lightly — jamming them in will just make extraction harder.
Steep scrambles: In places where you need both hands to climb, collapse your poles and stow them quickly. Some hikers try to wedge poles into rocks for leverage — don’t. That’s how tips snap and sections bend.
Emergency uses: Trekking poles can double as tent supports, splints, or even makeshift tripods. If you hike in remote areas, this versatility can make a difference.
📌Pro tip: For a deeper dive into choosing the right model for specific conditions, check out our guides like Best Trekking Poles for Backpacking and Best Collapsible Trekking Poles. They’ll help you match features to your exact hiking style.
Comparison Table – How to Use Trekking Poles Effectively (2025)
| Technique | When to Use | Key Adjustments | Main Benefits | Common Mistakes |
|---|---|---|---|---|
| Uphill climbing | Steep ascents | Shorten poles slightly | Better push-off, reduces leg burn | Poles too long, lifting arms too high |
| Downhill descents | Steep or rocky terrain | Lengthen poles slightly | Less knee strain, improved balance | Leaning too far forward |
| Flat terrain | Long-distance, steady pace | Neutral pole length | Maintains rhythm, saves energy | Overreaching with poles |
| Stream crossings | Shallow rivers, creeks | Extend poles for reach | Added stability, safer footing | Planting poles downstream |
| Snow/mud hiking | Slippery or sinking surfaces | Use large baskets | Prevents sinking, keeps balance | Planting poles too forcefully |
| Scramble sections | Rocky climbs | Collapse & stow poles | Hands free for climbing | Using poles for leverage on rocks |
Take away
Learning how to use trekking poles isn’t complicated — but it is a skill worth practicing. Once you dial in your length, grip, and technique, you’ll notice a huge difference in how you feel after a hike.
They’re not just “sticks for walking.” They’re tools that help you hike longer, protect your joints, and move with confidence — whether you’re climbing a steep ridge, cruising a flat forest trail, or picking your way across a rocky stream.
The more you use them, the more they become second nature. And once that happens, hiking without poles will feel like forgetting your water bottle — technically possible, but why would you?
If you’re ready to find the perfect pair, our Best Trekking Poles – Top 10 Picks for 2025 guide is the best place to start. From ultralight models for thru-hikers to collapsible travel-ready options, we’ve covered them all.